This is the third room that you’ll find yourself in - entitled “Memory.” If you want to take a look at our walkthrough of the Second Room you can find it via the link. So fire up your Escape The Room 2 game and let’s go!
You get to talk to the pretty nice lady when you first find yourself in the room. Tap, tap, tap through the conversation, don’t worry she’s not going to give away important clues to finding your way out of this one. When you’re ready to look around, it’s time to get going. This room is more difficult than the last and it also has a side-quest. We’ll talk about that in a minute.
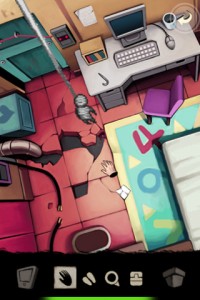
Here are the items you’ll need to get out of the room. On the north-wall desk, there’s a short wire (I haven’t used it at all during my escape, so it makes me wonder if I missed something). In the left-most drawer, there’s a jigsaw puzzle piece, and in the right drawer, you’ll find a cutter. On the floor, pick up the memo. Use the cutter to cut down the string doll hanging from the ceiling.
Move on to the south wall, and on the desk, in the tool box, pick up the nipper and the spanner. For the rest of the items lying around the room, you’ll need to solve a puzzle, open two safes and mix some elements to pick up the escape key located in the fish tank to the room’s east wall. So let’s get cracking.
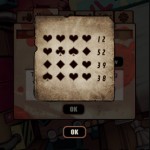
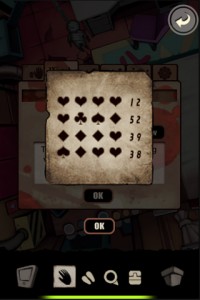
The most important thing is the puzzle on the memo. Go to your inventory and read the memo. You’ll see the four playing cards symbols (clubs, hearts, spades and diamonds) displayed on four by four grid with numbers next to each row. Weird, right?
Actually, it’s just basic math. Start with the first row. There are four hearts and the number 12. Jot down that hearts equal 3. The third row is the next you can solve. It has three diamonds and one heart, plus the number 39. Subtract one heart (3) from 39 and divide by 3 (the number of diamonds). You get one diamond equals 12. Repeat this process for the next two rows to get 20 for the clubs and 17 for spades.
If you’re wondering what to do with these numbers, take a look around the room. There are two safes, one in the southeast corner and one in the northwest corner. Each of them have one symbol on top, one has a heart and one has a spade. You know what to do. Use 17 as the password for the spades-branded safe and 03 (not just 3) for the hearts-branded one. You’ll pick up a diary and a magnet.
Open up the inventory and separate the doll you cut from the ceiling with your cutter. Move to the mix tab and combine the string from the doll with the magnet. Use that to pick up the escape key from the fish tank. Believe it or not, that’s it, you’re home free! Open the room with the key and you can move on from this level.
Additional quest
However, for the daredevils, there is an additional quest you can undertake if you’re up to it. This is how to do it.
You might have noticed on the floor to your left two pieces of electrical wire that are too short to put together. You need to find an additional piece to unite them and see what happens. To do this, get the nipper from the inventory and cut the wire from the door to the north (not the escape door). Then use the spanner to loosen the bolts. You can now open the door and go through it.
Surprise! You’re back in the first room you found yourself in (I love this game). Look around a bit, everything is mostly as you left it. If you open the safe to the north, you can pick up another golden key. The point of interest is the TV. Why? There’s nothing on anyway. But wait, it has a wire. Use the nipper to cut it and you’ve got what you needed from this room. Go back to the initial room.
Use the electrical cable as the missing part from the two other cables on the floor and push the elevator-like buttons to the southwest. The door will open and you can go through it.
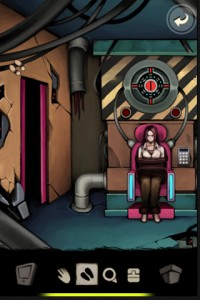
In the next room, you’ll find one of your former schoolmates tied to a machine. She’s mostly unconscious. It’s up to you to get her out. If only you knew the password to that machine…
If you inspect her closely with your magnifying glass, you’ll see that she’s wearing a necklace with a key around her neck. Take it and open the inventory to mix it with the diary you got from one of the safes. Read the diary and on the last page, you’ll get the password you need.
Enter the password in the machine and your friend is free as well. After a short conversation, you can move back to the initial room and use the escape door to get out. Congratulations, you’ve completed the side-quest as well.
Have this iPhone App already ?
What do you think of Escape The Room 2 ? Scroll down for our comment section and let us know!


